🌌 My Astrophoto Processing Workflow: From Stacking to final product (for Seestar)
This going to be a long article so heat up your PC, make some room for a new softwares and let's dive into this together! ⭐
Prerequisites
So, because I'm not a big fan of paid software, I'm not using that "cool boys" softwares like PixInsight. No, in my case, good free and open source Siril is more than enough!!

Also, I'm using two versions of the Siril software: [1.2.5] and [1.4.0]. Why? 😶 Because [1.4.0] works well with mosaic mode, but its color calibration is really weird!! * Always getting blue-orange color tones after applying color calibration and stretching the photo. And I don't know how to set it so it matches real colors.🤷🏻♀️ Maybe the Gaia catalogue for color calibration is somehow messing with Seestar's color format or something. Tried to ask at Reddit, but no counter-measures for now. So in the meantime, I'm using two versions 😄
Editing steps
So, first thing first: In the case of mosaic mode, the first few steps of processing will change. Let's cover non-mosaic stacking first, and after that, if you'd like to see an article about mosaic stacking, let me know in the chat or guestbook, and I'll create one! ⭐
Stacking in Siril:
Let's open Siril [v1.2.5]. Firstly, change your current directory (blue button with a house icon in the top-left corner) to the directory where you want processed files to be saved. * I'm always creating a new folder for this.
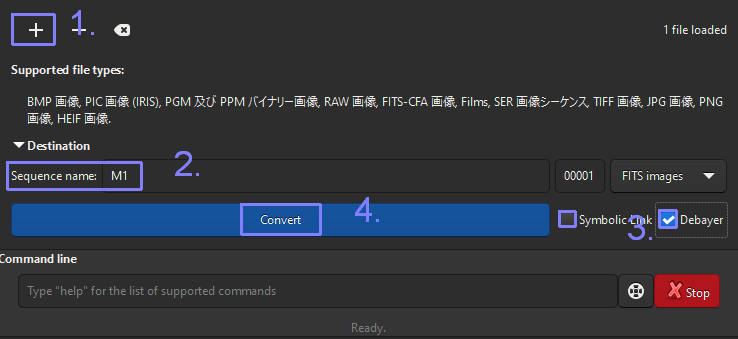
After that, let's load our .fit files from Seestar using the [+] icon from the interface (1. in the picture below). * You can ignore or delete .jpg files from Seestar, they are not needed.
Next step, let's name the sequence using the 2. column in the picture below and uncheck Symbolic Link and check Debayer (3.). After that, just press [Convert] (4.). This will process the files so Siril can use them.
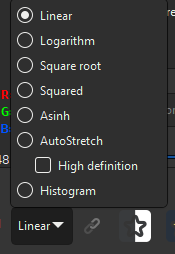
After that, let's change [Linear] to AutoStretch to be able to see something on the screen.
Next, let's register the pictures!! Here are the settings I'm using mostly (case-by-case, depends on light conditions)
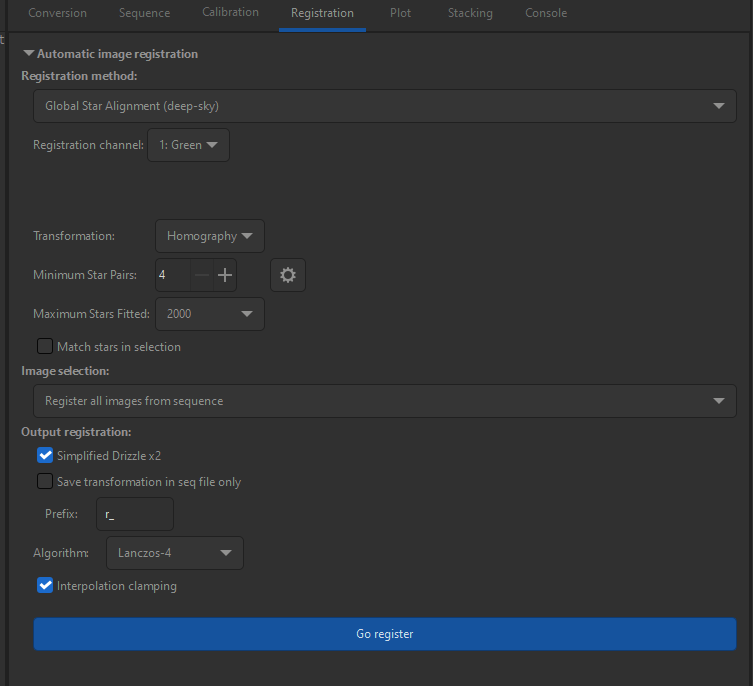
And hit [Go Register]. This will register the pictures for stacking. But before the stacking, we have something to do.
Open the [Plot] tab and also click the most bottom-right icon in the window (3 stacked pictures). This will open the plot as well as the list of registered pictures. After that, click [FWHM] to sort the list of pictures based on their values. When you click one of the pictures from the list, you can see it will appear as a dot on the graph. That's the one picture there! Larger [FWHM] values the picture has, the higher it will be on the graph. I usually uncheck all pictures from the list that have [FWHM] values larger than 6 and everything containing star-trails and satellites/airplanes.
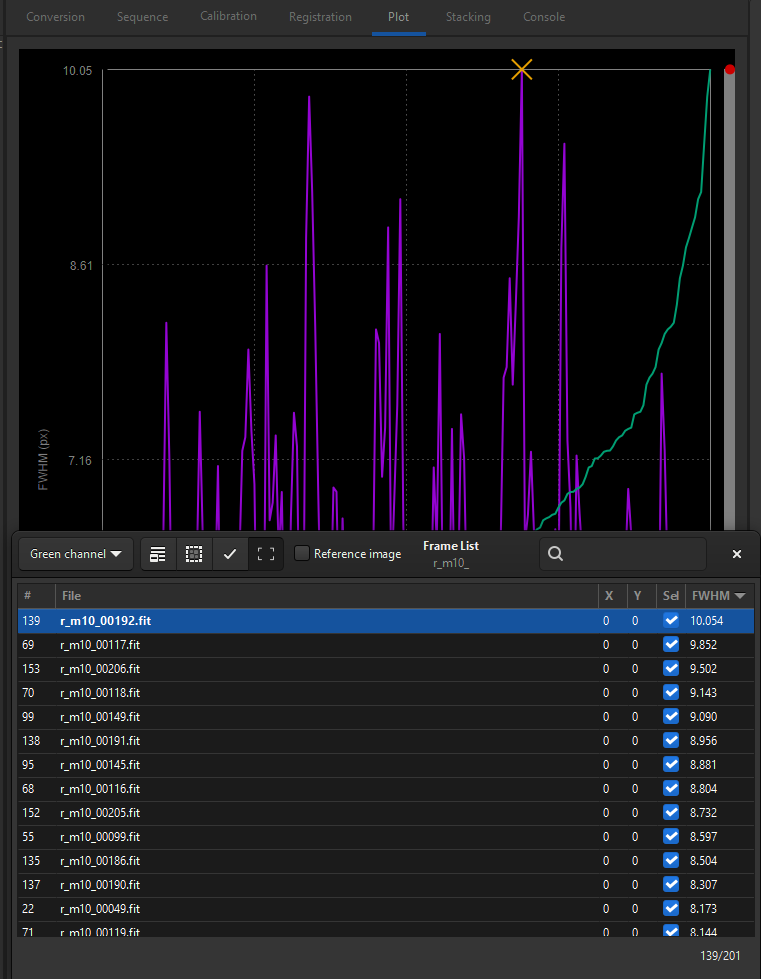
You can uncheck by pressing the spacebar on your keyboard!
After you've unchecked unwanted pictures, let's stack them! Hit the stack tab and set it as shown in the picture below.

These are the settings that work best for me, but feel free to experiment for the best result!
This will spin your fans and spike your CPU. After everything is done, we have a stacked picture!! Let's save it using the [Save] button in the top-right corner.
Processing in Siril:
For the next steps in processing, I recommend watching this video tutorial. It walks through the key features of Siril that I use for fine-tuning my images.
Processing in GraXpert:
After using Siril, I move to GraXpert for noise reduction and color correction. First download and install GraXpert
Open it and in right corner inside of Advanced tab, set the values as the picture below shows:
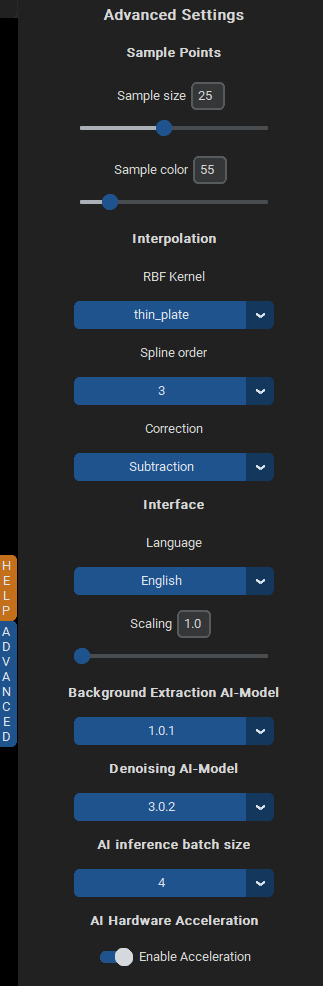
This will automatically download AI models for GraXpert. After everything is downloaded, restart the program.
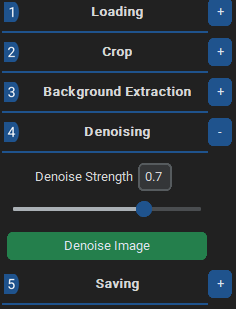
Next open your processed .fit file from Siril in GraXpert, by pressing green [Load Image] button in left-top corner. Press [Denoising] and set level of Denoising as you need! *I'm usually using 0.7.
Next hit save to save your image as .fit file!!

Processing in CosmicClaritySuite:
The final step in my workflow is using CosmicClaritySuite
You can find tutorials about installation of this tool in the site above.
After you have set-up and ready CosmicClaritySuite, open the source folder and move picture you saved using GraXpert into the input folder. Next run [setiastrocosmicclarity .exe] with default settings to sharpen your image. You will get processed image in [output] folder. After that run [setiastrocosmicclarity _superres.exe] for enlarging your picture (if you need), with the default settings and as input file insert the file from output foler. * As output file I usually set Desktop folder.
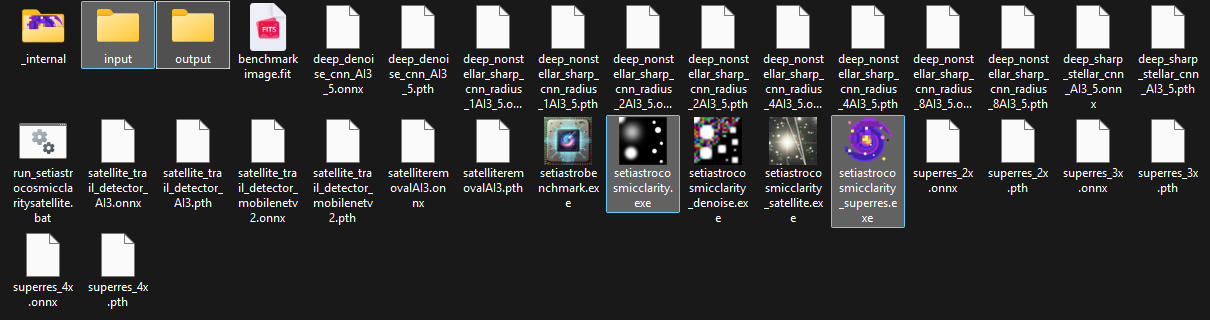
These are the files and folders mentioned above
After everything is done, you have almost ready-to-go picture!!
Open it once more in Siril and re-save it in format you want. * I'm usually using .tif format for post-processing in Lightroom.
Final words
That's it! My workflow for processing astro-images using Siril, GraXpert, and CosmicClaritySuite. It's hard to cover everything in one article, but I did my best to be as short as possible while mentioning all important steps. Let me know if you want to see an article like this for Seestar's mosaic mode.